The 23ai was released last month and was only available at Oracle Cloud deployments and a few places for free edition, nothing besides that. Last year it was also released (focused on the Devs) as a formerly 23c free edition. Fortunately, it was released to be used at ExaCC. So, now we can upgrade Grid Infrastructure (GI) and install the database to play with it.
In all previous scenarios, we had some constraints. For Dev’s we didn’t have RAC, DG, and GI features at all. And for OCI, we didn’t have access to manually create databases or deploy GI buy ourselves. For ExaCC we are free to deploy our GI, install RAC databases, and so on. Here I will show how to upgrade your GI from 19c to 23ai. We will reach this:
First things first, versions
First, one of the main requirements for 23ai is the Linux version. It only supports (or is compatible) with Oracle Linux 8. Nothing besides that. So, for ExaCC you need to be running the 23.x version., it is impossible to deploy/upgrade the 23ai (GI or Database) at ExaCC running version 22.x for the domU.

I even recommend that you be running the last version of Exadata Image, the 23.1.13.0.0.240410.1. This will guarantee that you have all the requirements for 23ai. The same is true for the Exadata Storage Version, you need to be running at 23.x, which will guarantee all compatibility between the Exadata Storage Software layer, GI, and Database running at 23ai. If you are not in the last versions, please update/upgrade to avoid any issues.
Second, the GI 23ai only supports the 19c and 23ai databases. If you have installed any Database Homes below 19c you need to terminate it. Even if it is just binary installed and no database running, you need to remove/terminate it. The precheck will not even start and block any attempt. If you think this is logical because now it is not even possible to install versions below 19c at ExaCC.
Third, the ASM rdbms compatible. The attribute “compatible.rdbms” needs to be 19.0.0.0. If you try the precheck will report:
…Checks did not pass for the following ASM disk groups:, RECOC9,DATAC9, Failures were encountered during execution of CVU verification request “stage -pre crsinst”., Disk group RDBMS compatibility setting …FAILED, DATAC9: PRVE-3180 : RDBMS compatibility for ASM disk group “DATAC9” is set to, “11.2.0.4.0”, which is less than the minimum supported value, “19.0.0.0.0”….
So, you need to change it to the correct version and retry the precheck.
How to do? Precheck
The upgrade process is quite simple and easy. It follows the traditional way: Precheck and Upgrade. So, the first thing is to enter “VM Cluster Information” details for your desired cluster and check the “Updates Available”. There you will enter the “Updates” pages and will see the “Grid Infrastructure updates” in the center of the page:

As you can see version 23.4.24.05 is available.
The next step is to click on the 3 points on the right (at the “Release Date” column) and click on the “Precheck” option:

The precheck will run for a few minutes and you can follow (of the first node of the cluster) the logs at the folder /var/opt/oracle/log/grid/upgrade. There you can check the “pilot” and the “dbaastools” logs, the pilot is the full output for all commands called.
How to do? Upgrade
After the precheck phase is finished, we can call the upgrade. It is a simple and automated process, we have no control over it, we just call and follow the logs. You just need to go to the same page as Precheck, and now click over the “Upgrade Grid Infrastructure”:

In the image above you can see that the column “Last Successful Precheck” is missing/blank. Is my fault, I forgot to take the picture. In your case, it will be filled with the correct time.
As I wrote above, it is an automated process and we have no control over it. We can follow the logs over the folder /var/opt/oracle/log/grid/upgrade and check the “pilot” log. Digging over it you can see that is a “simple” call over the “rootupgrade.sh”:
![]()
Another detail from the image above is that now the path has changed and it is “/u02/app/23.0.0.0/gridhome_1” instead of the “/u01/app/19.0.0.0/grid”. So, if you have some script/resource, be aware of this.
And now?
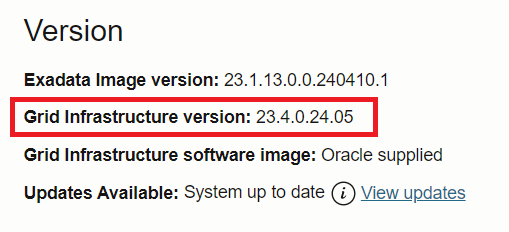
After the upgrade with success, you will reach the GI 23ai installed, version 23.4.24.05:

As you can see above, the process for ExaCC is pretty simple, there is nothing much that we can do. We just precheck, and upgrade it. Of course, you need to check the details linked with the version that I explained in the beginning. It is required to be running at Exadata Image version 23.x and I even recommend to have the ExaCC stack (domU and Storage Server Version) running at 23.x version. In case of any issues, please open SR and follow the support recommendations.
For several people, the most critical can be the Oracle Home versions. Just 19c and 23ai are supported. There is no other way. So, if you have not upgraded yet, you will need to do. NOW!
In the next posts, I will start to cover more details about 23ai related to MAA, DG, RAC, GI, and infrastructure.
Disclaimer: “The postings on this site are my own and don’t necessarily represent my actual employer positions, strategies or opinions. The information here was edited to be useful for general purposes, specific data and identifications were removed to allow reach the generic audience and to be useful for the community. Post protected by copyright
Pingback: ExaCC: Upgrade Grid Infrastructure to 23ai using OCI CLI – DBA Blog
Pingback: Upgrading to GI 23ai at ExaCC using CLI - Fernando Simon